This is specifically for installing a Medlin Drone Pro (Timing-Belt) FPV Gimbal.

Setup and Configuration:
First you will need to do the Configuration and Setup for Adding a FPV Gimbal to a Multirotor and be ready to plug in the servo.
You may or may not need to extend your camera wires or move your VTX forward in the frame. Camera extension cables available for Analog and DJI FPV at the Medlin Drone Store!
Install Gimbal:
To install, there are a couple different scenarios depending on the base design for the gimbal you have.
If all four bolts to secure the gimbal onto the drone are assessable without disassembly, then you can use a 2.00mm hex wrench to screw it on.
If the back two screws are covered by the servo, then you’ll need to take off the top plate of the drone, as well as the front four standoffs. Then put the screws through the top plate and screw the standoffs onto the screws, if you need to do this view the Disassembly/Reassembly of Gimbal section bellow.

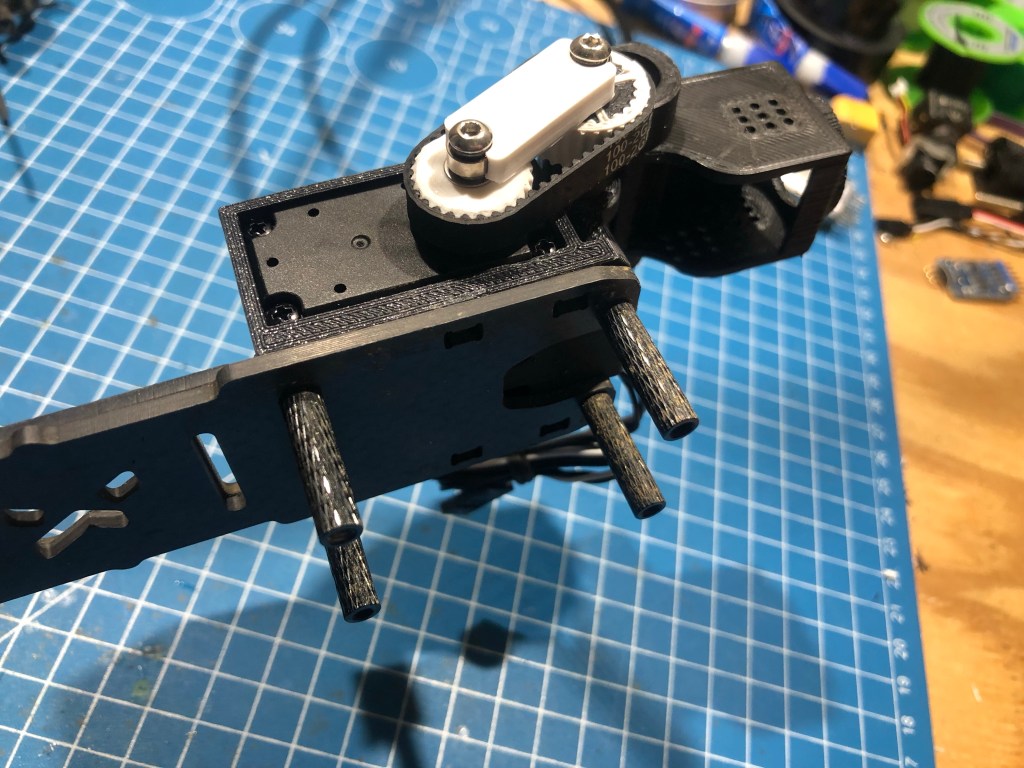
**If the method pictured above won’t work for your frame, you may need to partially disassemble the gimbal, reference the instructions/video for Disassembly/Reassembly bellow.
Once the gimbal is physically installed, simply connect/plug in the servo and install your FPV camera into the gimbal. Check that your FPV camera wires reach the camera, aren’t being pulled on when the gimbal rotates, and aren’t interfering with the propellers.
If the servo isn’t moving, try moving the input signal for the servo to both ends of travel. This is where having control of the channel via a slider/dial is useful, as described in the tutorial for adding a head tracker to your setup. You can have a switch change the control of the channel from a dial/slider to a head tracker or other source.
If you have all those steps complete, you’re done!
Here is my guide for your First Flights with a FPV Gimbal.
Note: If/when you want to unplug the built-in plug on the front of the servo, I recommend carefully using tweezers to unplug it as pulling on the cable directly can damage it.
Disassembly/Reassembly of Gimbal:
This section is a guide to taking apart and reassembling the gimble. There are a few useful techniques and tips for doing this and a few reasons one may want to do so:
- Adjust the range of motion, via removing the belt and reinstalling with the servo and gimbal in different positions.
- Access the back two mounting screws.
- Transfer gimbal onto a different drone. The gimbal base designs are open-source so if you have access to a 3D printer you can print a base for a different frame and move the gimbal onto that frame.
Disassembly:
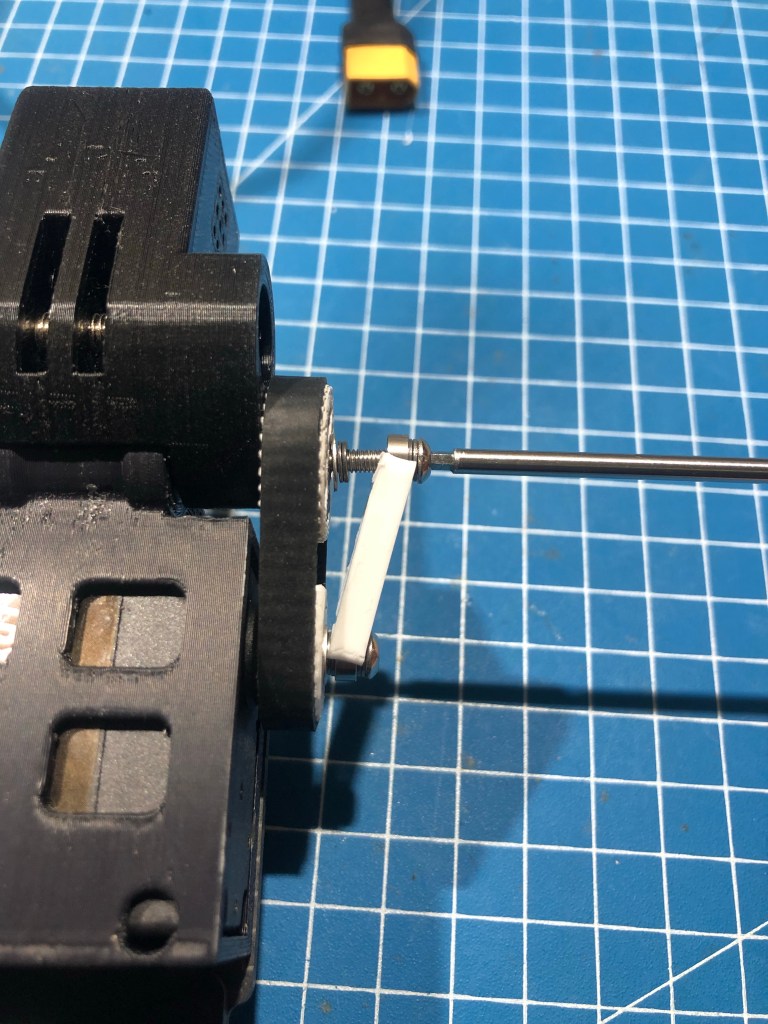
–Removing the tension strut:
- First, you’ll want to remove the tension strut, this isn’t absolutely necessary but makes removing the belt easier. Unscrew the front bolt of the tension strut, then remove the tension strut. You use the front bolt to remove and replace the tension strut, the bolt on the servo never needs to come off.

–Removing the belt
- Then, there will be less tension on the belt, and it will be easier to remove. Use your fingernails or a soft/dull tool to gently work the belt off of pulleys until it comes off, it can be useful to move the gimbal up and down by hand as you do this. It is important to not use a sharp tool to remove the belt as it can damage the belt.


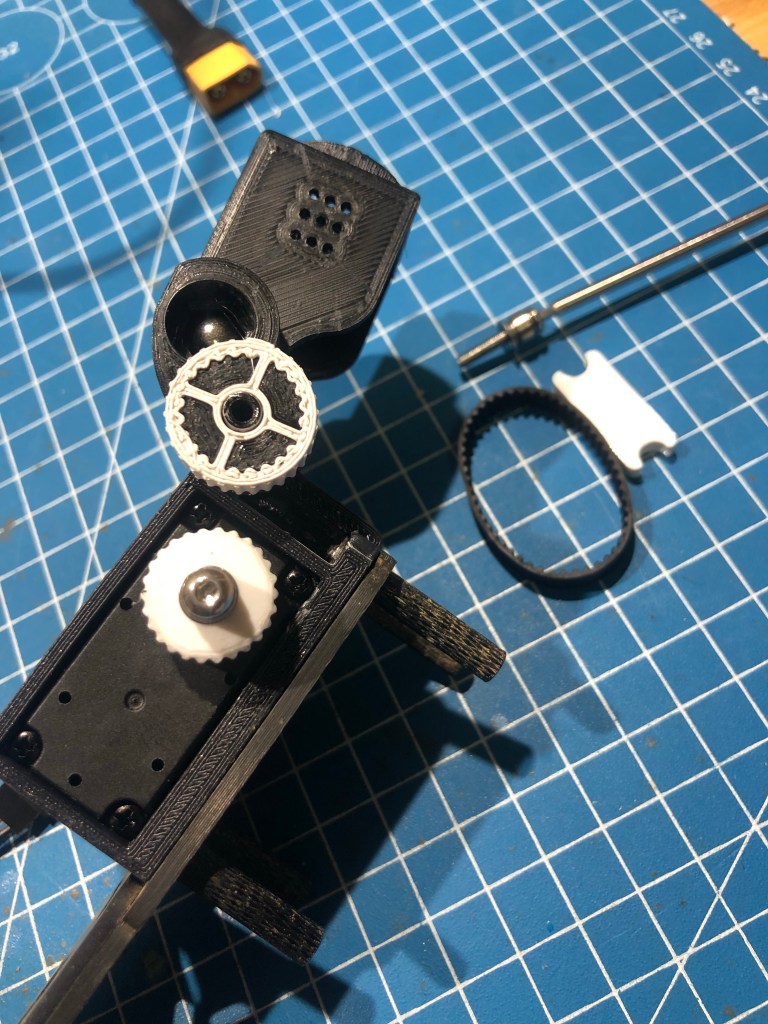

–Removing the servo:
- If needed, the servo can be removed from the base. First, remove the servo’s plug in the front, a pair of tweezers works well for this, do not just pull on the plug wires as this can damage them.
- Once the plug is out you can, press out the servo from the base, this can be done by hand or via a vice or other tools, just try to apply force evenly as putting too much pressure on a single point can damage the servo. Heating up the base slightly can make this a lot easier, via sitting in the sun, heat gun, warm oven, etc.
–Removing the mount:
- The gimbal base is open-source, meaning you can print it yourself for other frames if you want to swap the gimbal onto a different drone without having to buy another kit. To do this you will need to remove the mount, this is simple, just press out the axle from the mount, I usually press from the pulley side using a M3 hex wrench.
Reassembly:
–Installing the mount on the base:
- Simply press the axle in the the mount and through the bearings of the base.
–Installing the servo:
- Simply press the servo in the base, this can be done by hand or via a vice or other tools, just try to apply force evenly as putting too much pressure on a single point can damage the servo. Heating up the base slightly can make this a lot easier, via sitting in the sun, heat gun, warm oven, etc.
–Installing the tension strut:
- Before installing the belt, you will want to install the tension strut, as it will be difficult to install once the belt is on. Before screwing in the front bolt of the tension strut, push the tension strut onto the rear bearing then onto the front bearing, then screw in the front bolt such that as it screws in it is installing the tension strut (reference pics).

–Installing belt:
- The following video describes the steps, essentially you use the movement of the servo to put the belt on, this can be done other ways, but this is my preferred way and is done by hand. If you use tools, avoid any sharp or hard tools that could damage the belt or pullies.


**NOTE: In the video bellow, the tension strut is installed, it can be easier to install the belt with the tension strut off and then install the tension strut.
That is the end of the Timing-Belt specific instructions, please reference the primary guide for Adding a FPV Gimbal to a Multirotor for any other parts of setup or configuration.
–

3 thoughts on “Install and Assemble/Disassemble Pro (Timing Belt) FPV Gimbal”