This tutorial is for installing a Medlin Drone Mini (Sub-250) FPV Gimbal.

Setup and Configuration:
First you will need to do the Configuration and Setup for Adding a FPV Gimbal to a Multirotor and be ready to plug in the servo. Note that the servo wires are Orange (Singal), Red (5V) and Brown (Ground).
You may or may not need to extend your camera wires or move your VTX forward in the frame. Camera extension cables available for Analog and DJI FPV at the Medlin Drone Store!
Installing the Mini (Sub-250) FPV Gimbal
- Test servo control, using whichever auxiliary channel you assigned.
- Now is a good time to think about how you want to route your FPV camera wires, or extend them if you need to. This will vary from frame to frame.
- Check that your FPV camera wires reach the camera, aren’t being pulled on when the gimbal rotates, and aren’t interfering with the propellers.
- Mount the gimbal onto the frame and mount FPV camera into gimbal.
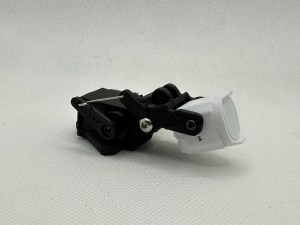
- You can adjust the movement/range of the gimbal via adjusting cameras themselves in the mounts, or by adjusting the length of the pushrod or position of the pushrod on the servo horn.
- Test the gimbal and make sure the FPV and action camera (if it is powered externally) wires are not being pulled/strained during movement and are clear from the propellers.
That’s it, if you haven’t already I recommend adding a head tracker to your setup and referencing the flight tips before your first flight. Happy flying, welcome to next level FPV!

One thought on “Install a Mini (Sub-250) FPV Gimbal to a Multirotor”